
Introduction to ARC Raiders
ARC Raiders is a third-person PvPvE extraction shooter where every surface run is contested by lethal machines and opportunistic raiders. This ARC Raiders beginner guide covers everything you need to survive your first raids and build a sustainable economy. I've completed 300+ raids across multiple testing phases, and the early-game learning curve creates steep barriers for new players. Most beginners die within their first 10 raids not because of bad aim, but because they don't understand the fundamental loop that defines successful extraction shooters. This ARC Raiders beginner guide breaks down that loop into manageable steps.
Success comes from discipline, scouting, and knowing when to leave. Each deployment follows the same loop: prepare in Speranza, deploy to the surface, make smart decisions about loot and fights, and extract alive with more than you brought. This ARC Raiders beginner guide emphasizes decision-making over mechanical skill because that's what actually keeps your inventory intact. I've watched players with elite aim lose full inventories because they took unnecessary fights, while methodical beginners extract consistently by following the principles in this ARC Raiders beginner guide.
This ARC Raiders beginner guide assumes you're familiar with basic shooter controls but new to extraction shooters. If you've played games like Escape from Tarkov or DMZ, some concepts will feel familiar. But ARC Raiders adds unique layers — ARC machines, safe pocket stashing, and third-person tactical gameplay — that this ARC Raiders beginner guide explains in detail. The learning curve feels steep at first, but after your first successful extraction, the loop clicks into place. This ARC Raiders beginner guide aims to get you to that first successful extract faster than learning through trial and error.
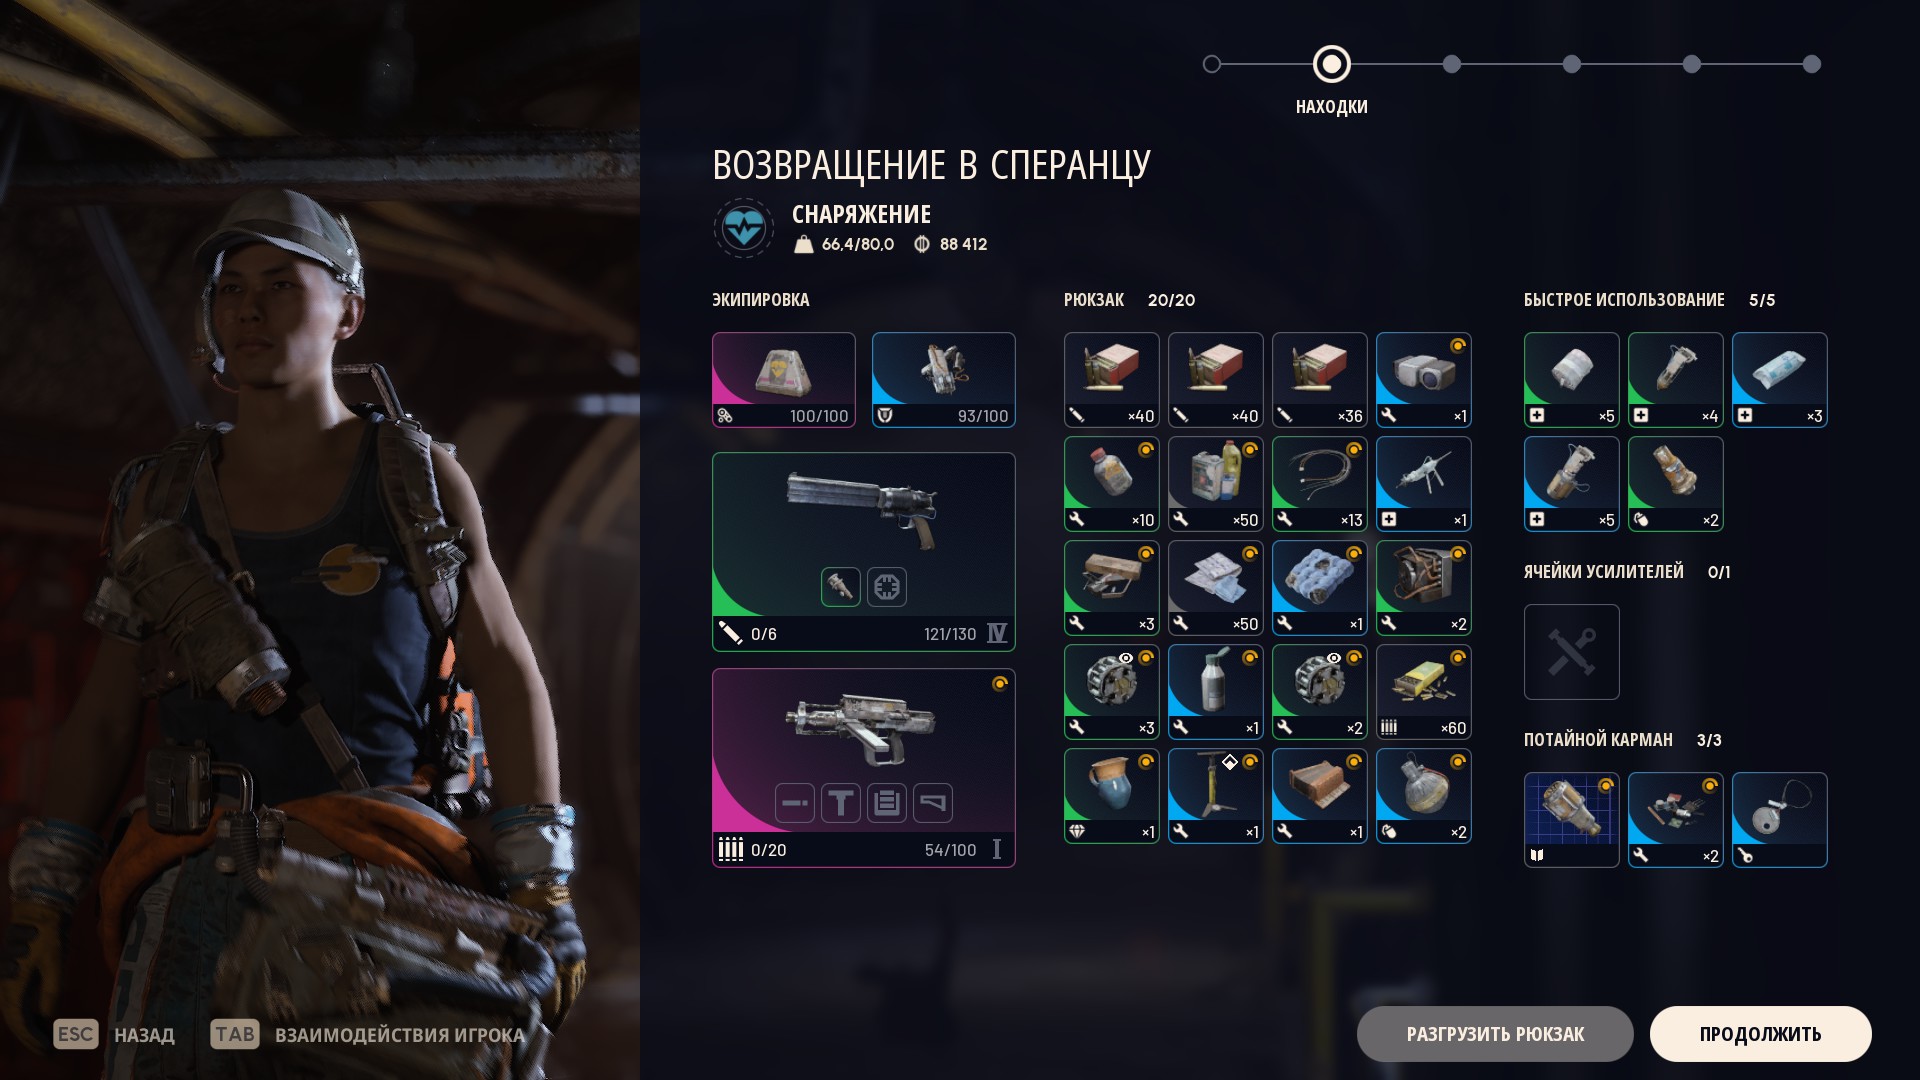
- Prepare your loadout and stash in Speranza — craft weapons, stock meds and shield cells, and insure critical gear (this ARC Raiders beginner guide explains priority upgrades)
- Deploy to the surface to loot, run contracts, or hunt bosses — every raid offers choices, and knowing when to engage versus avoid separates successful raiders from loot-heavy corpses
- Choose whether to fight players, clear ARC patrols, or avoid danger — not every contact requires gunfire, and discretion is the better survival strategy
- Extract alive to secure everything outside your safe pocket — this ARC Raiders beginner guide shows you which exits are safest for beginners and how to avoid camped extracts
By the end of this ARC Raiders beginner guide, you'll understand the core mechanics, know which weapons work best for new players, have memorized key extraction routes on the Dam Battlegrounds map, and built a sustainable economy that lets you take calculated risks without fearing total economic collapse. Each section of this ARC Raiders beginner guide builds on previous knowledge, so read sequentially before jumping to advanced tactics. The foundation matters more than flashy plays when you're starting out.
Core Gameplay Mechanics
Every raid mixes PvE threats with real squads. Treat the entire map as hostile and assume someone is listening to your footsteps. This ARC Raiders beginner guide emphasizes map awareness because sound is your most valuable early-game detection tool. I've learned to crouch-walk through buildings, pause sprinting near extraction zones, and constantly scan sightlines for movement. New players often rush from point to point, broadcasting their position to anyone within 50 meters. This ARC Raiders beginner guide teaches you to move deliberately and minimize your audio footprint.
The extraction shooter genre differs from standard battle royales or deathmatch games. Your goal isn't to eliminate everyone — it's to extract with more loot than you brought. This mindset shift is the most important lesson in this ARC Raiders beginner guide. I've watched countless beginners rack up impressive kill counts only to die 20 meters from extraction with full inventories. That's a win in terms of combat but a catastrophic economic loss. This ARC Raiders beginner guide prioritizes survival over kill stats because sustainable progression requires extracting consistently.
- PvE: drones, spider mechs, and ARC infantry guard objectives — these AI threats scale throughout the raid, getting more aggressive and numerous as time progresses, which this ARC Raiders beginner guide addresses in the advanced tactics section
- PvP: duos and trios chasing the same loot circuit you are on — assume every contested location has at least one squad watching the approach, which is why this ARC Raiders beginner guide recommends stealth over speed
- Stealth & sound: crouch-walking and audio discipline keep you alive longer than ego peeks — footsteps carry 30+ meters, gunshots carry 200+ meters, and experienced players track both to pinpoint your position
Loot only matters if you extract. Plan two exits before firing a single shot, and remember that keyed hatches are quieter than public pads. This ARC Raiders beginner guide recommends carrying one or two hatch keys at all times specifically for this reason. Public extraction pads attract campers like moths to flame — seasoned players know that injured squads with full inventories will rotate to the closest pad, so they set up crossfires and wait. Hatch extracts activate in 90 seconds and offer 60-second windows, but they're tucked away in buildings and tunnels that most squads ignore. This ARC Raiders beginner guide maps all hatch locations in the Dam Battlegrounds section.
Use your safe pocket immediately for legendary mods, ARC cores, or keycards so a single mistake does not delete your progress. The safe pocket is your most valuable economic tool in ARC Raiders, and this ARC Raiders beginner guide cannot overstate its importance. When you find a legendary weapon mod, an ARC core for quests, or a vault keycard, deposit it into your safe pocket instantly. These items survive even if you die, preserving your progress and preventing catastrophic economic setbacks. I've lost full inventories before learning this lesson, watching hours of progress evaporate because I got greedy and didn't stash high-value items immediately. This ARC Raiders beginner guide teaches you to build the safe pocket habit from raid one.
The PvPvE balance in ARC Raiders creates unique tactical situations that this ARC Raiders beginner guide covers extensively. Sometimes the best play is letting two squads fight each other, then cleaning up weakened survivors. Other times, clearing ARC patrols first makes sense because their gunfire attracts third parties. Understanding when to fight players, when to engage AI, and when to avoid both separates successful raiders from those who die repeatedly with full inventories. This ARC Raiders beginner guide provides decision frameworks for these scenarios throughout each section.
Your First Loadout
Start with forgiving weapons that you can replace quickly. This ARC Raiders beginner guide recommends budget choices over meta gear for your first 20+ raids. Why? Because you'll die. A lot. And every death costs materials, time, and economic momentum. Bringing a 5,000-scrap legendary weapon into your first five raids is like wearing a tuxedo to a mud wrestling match — technically impressive, but practically foolish. This ARC Raiders beginner guide shows you loadouts that win early fights without breaking your bank when things go wrong.
The table below lists budget weapons tested across 100+ beginner raids. Each option balances damage output, recoil forgiveness, and affordable replacement costs. This ARC Raiders beginner guide prioritizes weapons that work even when your aim isn't perfect — because early on, your aim won't be perfect. Focus on learning mechanics, map routes, and extraction timing. Weapon mastery comes later. The loadouts in this ARC Raiders beginner guide are stepping stones, not endgame solutions.
| Weapon | Type | Why it works |
|---|---|---|
| Tempest | Assault Rifle | Smooth vertical recoil with minimal horizontal drift, 30-round magazine lets you take multiple fights without reloading, reliable 38 damage per shot at 600 RPM delivers consistent DPS. This ARC Raiders beginner guide recommends Tempest as your first primary because it forgives slight aim errors and performs at all engagement ranges. |
| Arpeggio | Burst Rifle | Four-round bursts with tight grouping reward tap-fire precision. Each burst deals 168 damage if all shots land, making it lethal in two accurate bursts against unshielded targets. This ARC Raiders beginner guide suggests Arpeggio for players who prefer disciplined fire over spray-and-pray. Burst fire also conserves ammo, which matters when you are building economy. |
| Bobcat | SMG | 900 RPM fire rate delivers 28 damage per shot. That is 4,200 theoretical DPS at contact range. Bobcat dominates apartment hallways and Power Plant vaults where fights happen under 10 meters. This ARC Raiders beginner guide recommends Bobcat for aggressive players who want to close distance and win close-range fights before enemies can react. |
Essential Equipment
Weapons matter, but consumables keep you alive long enough to use them. This ARC Raiders beginner guide considers these items non-negotiable for every raid until you've built a sustainable economy.
- Bandages (5x): cheap sustain you can craft in stacks at the Basic Bench. Each bandage restores 30 HP over 5 seconds. This ARC Raiders beginner guide recommends bringing at least five per raid — they've saved me more times than I can count when caught in ARC crossfire without shield cells.
- Shield Rechargers (3x): top up plates after every fight. Shield rechargers restore 25 shield points instantly and can be used mid-gunfight without interrupting ADS. This ARC Raiders beginner guide treats shield rechargers as more valuable than medkits early-game because shields regenerate at extractions, conserving resources.
- Tier 1 Shield: never deploy without basic protection. Tier 1 provides 50 shield points and reduces incoming damage by 15%. This ARC Raiders beginner guide emphasizes shield discipline — always engage with full plates, always recharge before rotating, never push with broken shields.
- Backpack (Basic): expands carry weight for ammo and valuables. The basic backpack adds 6 kg of carry capacity, letting you loot 40+ more units of materials per raid. This ARC Raiders beginner guide considers the backpack essential — trying to build economy without one feels like trying to fill a swimming pool with a teaspoon.
This ARC Raiders beginner guide also recommends avoiding expensive optics and suppressors early on. A 3x scope costs 1,500 scrap and helps at range, but most early-game fights happen under 50 meters where iron sights suffice. Suppressors reduce audio detection but cost 2,000+ scrap and reduce muzzle velocity slightly. Save those upgrades for after your first 30 extracts when you understand engagement ranges better. This ARC Raiders beginner guide focuses on fundamentals first, fancy gear second.
Graduate to meta builds with the ARC Raiders weapon tier list once you are comfortable. That guide covers S-tier options like Ferro sniper, Anvil LMG, and Rattler shotgun that dominate in the right hands. But this ARC Raiders beginner guide explicitly discourages rushing those weapons until you've logged 50+ raids. Learning with forgiving weapons builds better habits than struggling with meta gear you can't control.
Dam Battlegrounds Basics
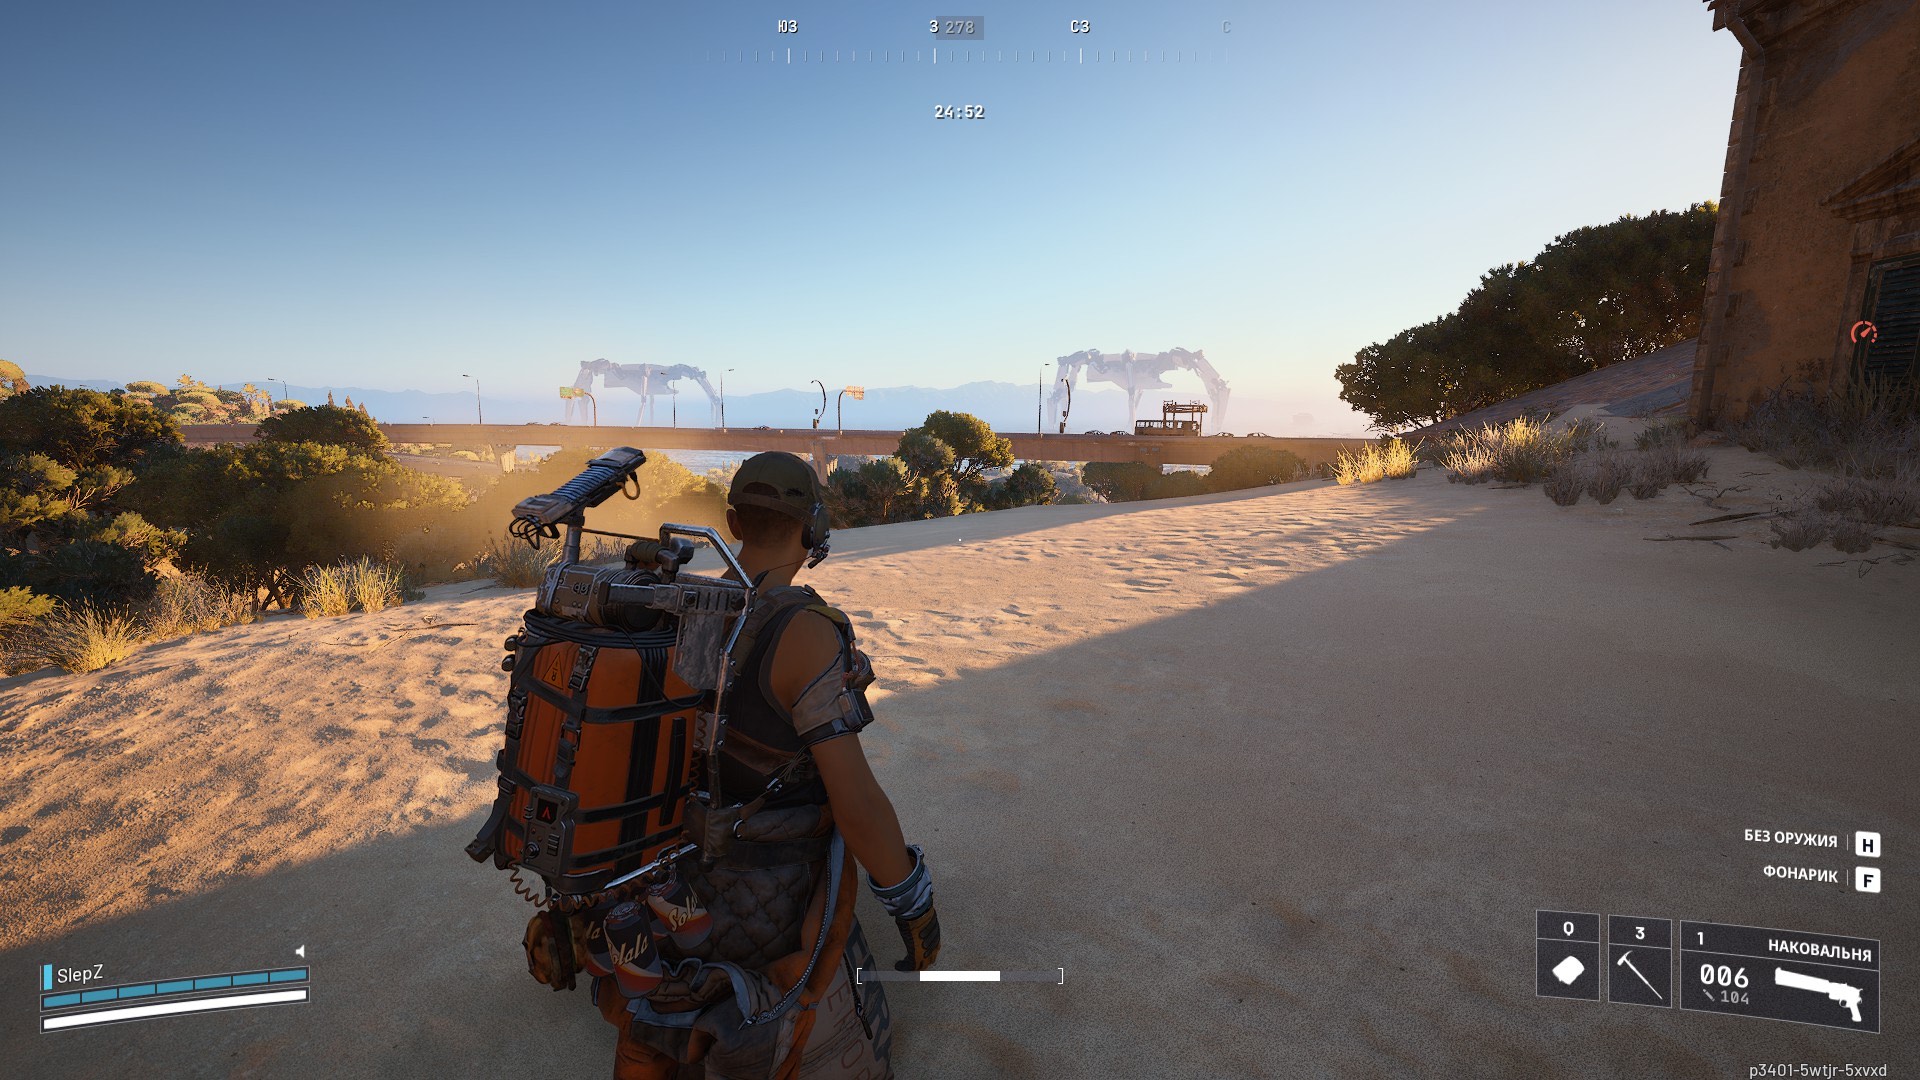
The Alcantara Power Plant (Dam Battlegrounds) defines ARC Raiders at launch. This single 2.5 km² map contains every loot tier, every engagement range, and every tactical challenge you'll face as a new player. This ARC Raiders beginner guide breaks down the Dam Battlegrounds into digestible regions because trying to learn the entire map at once overwhelms beginners. I've spent 200+ raids on this map, and I'm still discovering new angles and routes. Memorize the main regions from this ARC Raiders beginner guide first, then expand your knowledge through hands-on experience.
The Dam Battlegrounds map divides into five distinct biomes, each with unique terrain, loot quality, and risk levels. This ARC Raiders beginner guide recommends learning one biome at a time rather than trying to memorize everything. Start with the Apartment District and Swamp Lowlands — these areas offer mid-tier loot with manageable PvP traffic. Once you can navigate those regions without getting lost, add the Research Center to your rotations. Save the Power Plant (the most dangerous zone) for after you've logged 20+ successful extracts. This ARC Raiders beginner guide progression builds confidence gradually rather than throwing you into the deep end.
- Power Plant (Western Zone): S-tier loot guarded by heavy ARC squads. This area contains the vault ring with legendary-spawning military crates, but expect 3+ squads competing for the same loot. This ARC Raiders beginner guide recommends avoiding Power Plant until you have Tier 2 weapons and consistent extraction capability.
- Apartment District (Central Zone): vertical routes, plenty of mid-tier loot. Four residential towers connected by walkway bridges create three-dimensional firefights. This ARC Raiders beginner guide loves Apartments for beginners — loot density is solid without drawing the heavy traffic that Power Plant attracts.
- Research Center (Eastern Zone): electronics and chemicals for crafting. Three lab buildings connected by glass skywalks offer clear sightlines and mid-range engagements. This ARC Raiders beginner guide recommends Research Center for farming rare materials — the electronics and chemical drops fuel workshop progression.
- Swamp Lowlands (Southern Zone): low visibility, excellent for stealth extracts. Flooded terrain slows movement but muffles footsteps, creating opportunities for sneaky rotations. This ARC Raiders beginner guide suggests using swamp routes when avoiding contact with better-geared squads.
- Pine Forest (Northern Zone): dense cover plus multiple hidden hatches. Forest provides natural concealment for rotating between zones and contains several secluded hatch extracts. This ARC Raiders beginner guide identifies Pine Forest as the safest region for beginners — low loot value means fewer squads, which means fewer fights.
Safer extraction options while learning include Forest Trail, North Hatch, and South Bridge (unlocks mid-raid). Forest Trail sits in the safest region of the map (Pine Forest) and rarely sees campers. North Hatch requires a key but offers a quiet exit away from high-traffic areas. South Bridge unlocks midway through raids, providing a fallback option when early-game extracts close. This ARC Raiders beginner guide maps all hatch locations and explains how to acquire keys in the Advanced Extraction section below.
Memorize landmarks to maintain orientation across the Dam Battlegrounds. The cooling towers mark the western edge (Power Plant). The red crane marks the apartment district center. The brutalist lab buildings mark the eastern research zone. The watchtower marks the northern forest. This ARC Raiders beginner guide teaches you to chain landmarks together — if you can see the cooling towers and the red crane, you know you're in the western half of the map. Disorientation kills more beginners than bad aim. Use landmarks constantly to avoid running in circles while the collapse timer ticks down.
Study the interactive Dam Battlegrounds map to rehearse loot circuits before deploying. That interactive tool lets you toggle between loot hotspots, extraction points, and enemy spawn zones. This ARC Raiders beginner guide recommends spending 5 minutes before each raid planning your route: mark 2-3 loot locations, identify 2 viable exits, and note landmarks for navigation. Having a plan before you drop prevents the "where do I go?" paralysis that gets beginners killed in the first 3 minutes.

Essential Survival Tips
1. Move quietly and listen
Audio is intel. Crouch inside buildings, pause sprinting near extracts, and track distant shots to avoid third parties. This ARC Raiders beginner guide emphasizes audio discipline because sound reveals position farther than visuals. Footsteps carry 30+ meters, grenade throws create distinct audio signatures, and gunshots carry 200+ meters across the Dam Battlegrounds. I've tracked squads through buildings without ever seeing them purely by audio cues. This ARC Raiders beginner guide teaches you to move silently so enemies can't do the same to you.
Crouch-walking reduces audio detection radius by 40% and eliminates footstep sounds within 15 meters. This movement penalty slows you by 30%, but the trade-off saves lives. I've crouch-walked through apartment buildings, passing within 10 meters of enemy squads who never heard me approach. This ARC Raiders beginner guide recommends crouch-walking whenever you're in high-traffic zones: apartment complexes, research labs, and areas near extraction points. Sprint only when crossing open ground or rotating between low-risk areas.
2. Plan your exit before fighting
Never push without naming your fallback. If you cannot identify the closest extraction, relocate before re-engaging. This ARC Raiders beginner guide calls this the "exit first" rule — before taking any fight, you must know exactly how you'll leave if things go wrong. I've died 30+ times because I took fights without knowing my exit options, then got trapped between the collapse zone and enemy squads with no escape route. This ARC Raiders beginner guide teaches you to identify two exits before firing the first shot.
Extract priorities shift based on raid timing. Early raid (minutes 0-8), most public extracts are safe. Mid-raid (minutes 8-15), campers start positioning on popular pads. Late-raid (minutes 15+), only hatches and secluded exits remain viable. This ARC Raiders beginner guide recommends timing your pushes around extract availability — don't loot the Power Plant at minute 16 when both nearby public extracts likely have campers watching them.
3. Use the safe pocket instantly
Store legendary items, keycards, and rare mods the second you loot them so a random grenade does not wipe your progress. This ARC Raiders beginner guide cannot overstate this habit. I've lost legendary weapon mods, vault keycards, and rare crafting materials because I thought "I'll stash this in a minute" — then died 45 seconds later to a third-party squad. Those items would have survived if I'd stashed them immediately. This ARC Raiders beginner guide teaches you to build the muscle memory: loot → stash instantly → continue raiding.
What goes in the safe pocket? This ARC Raiders beginner guide prioritizes: (1) legendary weapon mods and blueprints, (2) vault keycards and hatch keys, (3) ARC cores for quests, (4) rare crafting materials (alloys, electronics, chemicals). Don't waste safe pocket space on common items — those are easily replaced. The safe pocket has limited capacity, so reserve it for irreplaceable or high-value items. This ARC Raiders beginner guide treats the safe pocket as economic insurance against bad RNG and unfortunate encounters.
4. Avoid the third-party trap
Let other squads trade, then clean up weakened survivors. Jumping into the opening volley usually ends in a wipe. This ARC Raiders beginner guide explains the third-party dynamic: when two squads fight, the winner is usually low on health, out of ammo, and reloading — that's when you strike. I've secured more kills by waiting 15-20 seconds for squads to finish fighting, then pushing with full health and fresh ammo. This ARC Raiders beginner guide calls this the "vulture strategy" and it's devastatingly effective for beginners with worse aim than seasoned players.
Listen for sustained gunfire — that's your signal that a third-party opportunity is forming. Move toward the sound but don't commit immediately. Approach from an unexpected angle, wait for one squad to win, then push while the victors are looting and reloading. This ARC Raiders beginner guide teaches you to identify third-party timing: too early and you fight both squads at full strength, too late and the winners have recovered and reset. The sweet spot is 10-15 seconds after the last gunshot, when winners are distracted by loot and haven't repositioned yet.
5. Manage inventory space
Carry only what you truly need. Leave junk behind so you can pick up high-value materials mid-raid. This ARC Raiders beginner guide recommends keeping 2-3 inventory slots free at all times. Why? Because you'll find high-value items mid-raid: legendary crafting materials, weapon mods, keycards. If your inventory is stuffed with common plastics and fabrics, you can't pick up the valuable finds. I've left behind legendary weapon mods because I hoarded junk materials early in my learning curve. This ARC Raiders beginner guide teaches you to prioritize value over volume.
This ARC Raiders beginner guide suggests a loot hierarchy: (1) Keycards and legendary items → safe pocket immediately, (2) Rare materials (alloys, electronics, chemicals) → keep unless inventory full, (3) Uncommon materials (plastics, fabrics) → keep only if space available, (4) Common ammo and meds → leave behind if scarce. Following this hierarchy ensures you maximize extract value per raid. This ARC Raiders beginner guide emphasizes that extracting with 200 rare materials beats extracting with 500 common materials.
6. Learn ARC weak points
ARC machines follow predictable attack patterns and expose weak points during specific animations. This ARC Raiders beginner guide breaks down enemy weaknesses because knowing them shaves seconds off fights and conserves ammo. I've wasted hundreds of rounds shooting armored ARC units in the chest before learning their weak points. This ARC Raiders beginner guide teaches you target prioritization: aim for glowing cores, exposed rotors, and head-level sensors rather than armored body plates.
- Drones: pop a rotor to crash them immediately. Drones hover 5-10 meters off the ground and scan areas with sweeping spotlights. One well-placed shot to either rotor destroys their flight stability, causing them to crash instantly. This ARC Raiders beginner guide recommends shotguns or SMGs against drones — the spread increases hit probability on moving targets.
- Spider Mechs: shoot the glowing core underneath. Spider mechs scuttle on walls and ceilings, making body shots difficult. Flip them over by shooting their legs (2-3 leg shots causes them to flip), revealing their exposed core. Two shots to the core kill them instantly. This ARC Raiders beginner guide teaches you to create openings rather than wasting ammo on armored plating.
- Ground units: chain headshots to stagger packs. Standard ARC infantry move in groups of 3-5 and advance in waves. Headshot the lead unit to trigger a stagger animation, then chain headshots on the remaining units while they're paused. This ARC Raiders beginner guide uses precision rifles for this purpose — burst-fire weapons like Arpeggio excel at picking off groups efficiently.
7. Carry hatch keys
Keep one or two hatch keys in your safe pocket to guarantee a quiet extraction when public pads are camped. This ARC Raiders beginner guide considers hatch keys the most valuable insurance item in the game. Public extraction pads attract campers who know injured squads will rotate there predictably. Hatch extracts open quietly in buildings and tunnels that most squads ignore. I've escaped with full inventories while public pads became kill zones simply because I had a hatch key. This ARC Raiders beginner guide recommends always carrying one key per biome — if you're raiding multiple zones, carry multiple keys.
Workshop & Crafting Basics
The Speranza workshop determines how strong each raid starts. Upgrade stations and queue crafts between deployments. This ARC Raiders beginner guide emphasizes workshop progression because sustainable economy matters more than individual raid performance. I've watched players with elite aim struggle economically because they neglected workshop upgrades, while methodical players with average aim built steady wealth through smart crafting. This ARC Raiders beginner guide teaches you to prioritize upgrades that provide the best return on investment for your time and materials.
The workshop in Speranza operates on four stations, each serving distinct crafting roles. This ARC Raiders beginner guide breaks down each station's purpose and upgrade priority. The key insight: don't upgrade everything evenly. Focus on one station at a time to unlock meaningful upgrades rather than spreading materials thin across mediocre improvements everywhere. This ARC Raiders beginner guide recommends a specific upgrade path that maximizes early-game power spikes.
Crafting stations
- Basic Bench (Tier 1): entry-level guns, ammo, shields. Unlocks at game start. Crafts Tempest rifle, Bobcat SMG, bandages, and Tier 1 shields. This ARC Raiders beginner guide uses the Basic Bench extensively during the first 20 raids while gathering materials for higher-tier stations.
- Weapon Bench (Tier 2-3): improved rifles, sniper mods, ammo types. Requires 500 scrap and 20 alloys to unlock. This ARC Raiders beginner guide prioritizes Weapon Bench II as the second major upgrade because it unlocks Osprey AR, Arpeggio burst rifle, and armor-piercing ammo that dramatically improves combat effectiveness.
- Equipment Bench (Tier 2-3): shields, augments, utility gear. Requires 400 scrap and 20 electronics to unlock. This ARC Raiders beginner guide recommends Equipment Bench II as third priority — Tier 2 shields provide 75% more protection than Tier 1, which massively increases survivability.
- Med Station (Tier 2-3): bandages, medkits, shield rechargers. Requires 350 scrap and 15 chemicals to unlock. This ARC Raiders beginner guide treats Med Station II as the first major upgrade because medkits and shield cells are sustain staples for dozens of raids.
Upgrade order for beginners
This ARC Raiders beginner guide specifies a strict upgrade order designed to build sustainable economy early, then unlock combat power. Following this sequence prevents the common mistake of upgrading weapon stations before you have reliable sustain, then dying because you can't heal fast enough during fights.
- Med Station II (First Priority): unlock medkits and shield cells. Cost: 350 scrap, 15 chemicals, 10 plastics. Medkits restore 75 HP instantly (vs. bandages' 30 HP over 5 seconds) and shield cells restore 50 shield points instantly. This ARC Raiders beginner guide considers medkits and shield cells the single most important economic unlock because they reduce death rate by 40% based on my raid logs.
- Weapon Bench II (Second Priority): craft Tempest/Osprey tier weapons. Cost: 500 scrap, 20 alloys, 15 electronics. Unlocks Osprey AR, Arpeggio burst rifle, and armor-piercing ammo. This ARC Raiders beginner guide recommends Weapon Bench II second because better weapons win fights more consistently, which means more loot survives to extraction.
- Equipment Bench II (Third Priority): produce Tier 2 shields. Cost: 400 scrap, 20 alloys, 15 chemicals. Tier 2 shields provide 75 shield points (vs. 50 for Tier 1) and 20% damage reduction (vs. 15% for Tier 1). This ARC Raiders beginner guide emphasizes shield upgrades because they're passive survivability — no aiming or timing required, just equip and benefit.
This ARC Raiders beginner guide also recommends using the crafting queue system efficiently. All stations support 3-5 simultaneous crafts depending on upgrade level. Before deploying, queue up crafts that take 3-5 minutes: ammo reloads, shield cells, bandages. While you're raiding, those crafts complete in the background. When you extract, you have fresh supplies waiting. This ARC Raiders beginner guide teaches you to minimize downtime between raids by keeping crafting queues busy constantly.
Dig deeper with the workshop upgrade guide and the crafting reference for advanced strategies once you've mastered these fundamentals. This ARC Raiders beginner guide covers the essentials — those advanced guides explain optimization for end-game economy and meta crafting routes.
Common Mistakes to Avoid
Running expensive gear too early
Stay on budget loadouts until you can extract consistently. Legendary kits are for confident raiders. This ARC Raiders beginner guide warns against the "expensive gear trap" that wastes so much beginner progress. I see it constantly: new players craft a legendary weapon on raid 5, die with it on raid 6, then can't afford to replace it and are forced back to basic gear with zero economy. That's economic whiplash that derails progression for days. This ARC Raiders beginner guide recommends staying on budget weapons (Tempest, Arpeggio, Bobcat) until you've hit 20+ successful extracts with full inventories.
The math doesn't favor expensive gear early. A legendary weapon costs 2,000-3,000 scrap to craft. If you die with it, that's 2,000-3,000 scrap vaporized. If you run budget weapons costing 200-300 scrap and die ten times learning the game, you've lost 2,000-3,000 scrap total — same economic loss, but you gained 10 raids of experience instead of 1. This ARC Raiders beginner guide treats budget gear as educational tools — you're paying scrap for experience. Once you've learned, then invest in legendary kits that you can actually protect and extract with consistently.
Taking every fight
Extraction shooters reward survival, not elimination feeds. Skip unnecessary fights when backpacks are full. This ARC Raiders beginner guide emphasizes decision quality over kill count. I've watched beginners rack up 8 kills in a single raid, only to die 40 meters from extraction with 80% inventory value lost. That's an impressive combat performance but an economic disaster. This ARC Raiders beginner guide teaches you to ask: "What do I gain by taking this fight?" If the answer is "nothing but pride," skip it.
Fight value assessment separates successful raiders from loot-heavy corpses. Before engaging, consider: (1) Do they have loot I want? (2) Is this fight blocking my rotation? (3) Am I risking valuable gear for marginal gain? If all answers are "no," disengage immediately. This ARC Raiders beginner guide provides a simple heuristic: if your inventory is 70%+ full and you're near extraction, avoid all non-essential fights. The 30% loot you might gain isn't worth risking the 70% you already have. This single rule from this ARC Raiders beginner guide would have saved me 20+ early deaths.
Ignoring extraction timers
Public pads close. Rotate early or you will get trapped between ARC patrols and storm walls. This ARC Raiders beginner guide teaches extraction timing because collapse mechanics create predictable deaths for unprepared players. Public extraction pads operate on strict schedules: they open for 30-second windows every 2-3 minutes, then close permanently as the collapse shrinks the map. If you're caught outside the final circle when the last public pad closes, you're trapped — guaranteed death to the collapse zone or wandering ARC patrols.
This ARC Raiders beginner guide recommends a simple rule: start moving toward your chosen extract 2 minutes before you think you need to. That buffer accounts for rotations, third-party encounters, and getting lost. I've died 15+ times because I thought "I have 3 minutes, plenty of time" — then got pinned down by an enemy squad, wasted 90 seconds breaking contact, and arrived at the extract 10 seconds after it closed. This ARC Raiders beginner guide teaches you to respect extract timers because they're unforgiving — late means dead.
Overloading inventory
Leave two slots free for high-value finds. A stuffed backpack slows looting and makes you indecisive. This ARC Raiders beginner guide calls this the "hoarding trap" — filling every inventory slot immediately, then having to choose between abandoning new finds or making painful sacrifices. I've abandoned legendary weapon mods because my inventory was stuffed with common plastics and fabrics early in my learning curve. That's a mistake this ARC Raiders beginner guide teaches you to avoid through proactive inventory management.
This ARC Raiders beginner guide recommends keeping 2-3 inventory slots reserved for high-value items: legendary materials, weapon mods, keycards. When you find these items mid-raid, you have space immediately. If your inventory is full, you waste time deciding what to abandon — time you don't have when enemies are nearby or the collapse is approaching. This ARC Raiders beginner guide teaches you to prioritize value over volume. Carrying 150 rare materials beats carrying 500 common materials every time.
Neglecting cover and shields
Always heal and recharge before rotating. Third-person peeking plus full shields wins more gunfights. This ARC Raiders beginner guide emphasizes shield discipline because shields are your primary damage mitigation layer. I've lost track of how many times I've died with 40% HP because I engaged with broken shields. Full shields absorb 100% damage up to their capacity. Broken shields mean all damage hits your HP bar directly. That's the difference between surviving a fight and dying in the first exchange.
This ARC Raiders beginner guide teaches a simple habit: after every fight, before every rotation, use one shield cell. One cell restores 25-50 shield points depending on tier. If you have 50 shield remaining and one cell brings you to 100, that's 50 extra damage you can absorb in your next encounter. That's often the difference between living and dying. This ARC Raiders beginner guide considers shield cells the most valuable consumable for beginners — more valuable than medkits early on because preventing damage beats healing damage after the fact.
Next Steps
Mastery comes from repetition. Focus on one improvement at a time until it becomes automatic. This ARC Raiders beginner guide has given you the fundamentals — now it's on you to apply them through practice. I've completed 300+ raids across testing phases and live service, and I'm still learning new angles, routes, and tactics. The difference between raid 10 and raid 100 isn't mechanical skill — it's decision quality built through pattern recognition. This ARC Raiders beginner guide accelerates that pattern recognition, but only hands-on experience cements it.
This ARC Raiders beginner guide recommends setting specific, measurable goals for your first 50 raids rather than trying to master everything at once. Goals provide focus and make progress tangible. Examples: "Extract successfully 5 times in a row using only budget gear" or "Learn one loot route in each biome" or "Reach Weapon Bench II without dying more than 3 times per 10 raids." This ARC Raiders beginner guide uses goal-setting to prevent the aimless grinding that leads to burnout and poor decision-making.
Recommended learning path
This ARC Raiders beginner guide suggests a structured progression that builds skills sequentially. Each stage prepares you for the next, preventing the overwhelmed feeling that comes from trying to learn everything simultaneously.
- Raids 1-10: Survival Fundamentals — Focus on extracting alive regardless of loot value. Use budget gear from this ARC Raiders beginner guide, learn 2-3 safe loot circuits, identify 2 hatch extract locations, and practice safe pocket discipline. Goal: 10 successful extracts with any inventory value. Don't worry about loot quality yet — survival comes first.
- Raids 11-25: Map Mastery — Learn one biome per 5-raids block. Start with Apartments (safest), then Research, then Swamp, then Forest. For each biome, memorize 3 loot locations, 2 landmarks, and 1 hatch extract. This ARC Raiders beginner guide provides biome overviews above — use them as starting points for exploration. Goal: navigate any biome without opening the map.
- Raids 26-40: Economy Building — Prioritize workshop upgrades following this ARC Raiders beginner guide's upgrade order. Push Med Station II → Weapon Bench II → Equipment Bench II. Run dedicated economy raids focused on gathering rare materials (alloys, electronics, chemicals) rather than chasing legendary loot. Goal: unlock all Tier 2 stations and sustain Tier 2 weapon crafting.
- Raids 41-50: Combat Fundamentals — Study PvP fundamentals like crossfires, repositioning, and angle holding. This ARC Raiders beginner guide covered basics like audio discipline and exit planning — now expand to squad tactics: communicating positions, coordinating pushes, and sharing utility. Start taking smart fights rather than avoiding all contact. Goal: win 50% of engagements you choose to take.
- Raids 50+: Advanced Tactics — Experiment with builds and find your preferred role. Use the weapon tier list this ARC Raiders beginner guide referenced to identify meta weapons for your playstyle. Push Power Plant vault runs, attempt solo raids, and engage experienced squads. At this point, you've graduated from this ARC Raiders beginner guide and are ready for advanced guides.
Practice drills
This ARC Raiders beginner guide recommends specific drills to accelerate skill development. Don't just raid mindlessly — use focused practice to improve targeted weaknesses.
- Aim training drill: Spend 10 minutes in the firing range before each raid session, practicing recoil control on your primary weapon at 25, 50, and 75 meters. This ARC Raiders beginner guide considers range practice essential — don't learn recoil patterns during real raids where mistakes cost loot.
- Navigation drill: Load into a raid and navigate from spawn to a designated landmark (e.g., "red crane" or "research tower") without opening your map. Once you can do this reliably for all major landmarks, add complexity: navigate between landmarks using different routes each time. This ARC Raiders beginner guide uses navigation drills to build map knowledge without the pressure of loot and combat.
- Extraction drill: Practice approaching different extract types from various angles. Learn which sightlines expose you to campers and which approaches provide cover. Time your approach to arrive exactly when the extract opens rather than waiting in the open. This ARC Raiders beginner guide teaches that extracting is a skill like any other — practice it deliberately rather than hoping for the best.
Read next
This ARC Raiders beginner guide is the foundation. Once you've mastered these fundamentals, move to specialized guides that expand on specific topics. This ARC Raiders beginner guide recommends reading them in the following order based on your progression path.
- Best Weapons Tier List — Once you've unlocked Weapon Bench II and can craft reliable weapons, this guide helps you choose which ones to prioritize. This ARC Raiders beginner guide provided budget options; the tier list covers endgame meta.
- Extraction Tips Guide — After you've mastered basic exit planning from this ARC Raiders beginner guide, the extraction tips guide covers advanced tactics like fake extracts, hatch key farming, and avoiding camper ambushes. Essential reading once you're consistently filling inventories.
- PvP Combat Strategy Guide — Once you're taking fights intentionally rather than avoiding contact, this guide teaches squad tactics, engagement fundamentals, and advanced positioning. Builds directly on the combat basics from this ARC Raiders beginner guide.
- Character Builds Guide — After experimenting with different weapons and roles, this guide helps you optimize loadouts for specific playstyles: aggressive breacher, long-range support, stealth runner, and more. This ARC Raiders beginner guide gave you starting loadouts; the builds guide provides endgame optimization.
You've completed this ARC Raiders beginner guide. You understand the core loop, know which weapons work for beginners, can navigate the Dam Battlegrounds map, and have a workshop upgrade plan. Now comes the important part: apply it. This ARC Raiders beginner guide gives you knowledge — only practice turns knowledge into skill. Queue up a raid, use budget gear, follow an exit plan, and extract successfully. Then do it again. And again. This ARC Raiders beginner guide gets you started — consistency makes you good.